Saturday 27 June 2015

Learning things

Started learning 3ds Max to be able to add it into my toolset. As a dedicated Maya user since the dawn of my 3D adventures, I was a bit worried that it will be difficult to learn and Max has always seemed quite confusing to me. Surprisingly it took less than a day to figure out the UI and learn how the program works and while my muscle memory is still screwing me over from time to time I can definitely see why some people prefer Max over Maya for modelling, it is actually quite awesome.

Huge thanks to David Lesperance for the "Intro to 3ds Max" gumroad series! Would recommend it to anyone looking to pick up Max: https://gumroad.com/metalman123456123

I have also started diving more into Substance Designer, more specifically the procedural texture creation. I've been using SD for a while, but mostly only for baking and compositing/editing maps that were brought in from the outside. One of the goals I've set for the Abandoned Farmhouse scene was to learn and use Substance Designer more to create the textures procedurally (or Zbrush if I can't do it in SD) and then add some final touches in Painter, rather than using photo-sourced textures and relying a lot on Photoshop which is what I've been used to doing in the past.

I tried to create a country-side road type of material completely procedurally to replace the placeholder one I have in the scene right now, and while I can spot a lot of mistakes looking at it now, it was really fun and taught me a lot about different nodes.

The first thing was to collect clear high res reference images which I think is very important so you're not doing anything off the top of your head. I then scanned through them to figure out what makes that material recognisable, what kind of detail I will need to create etc. I also took note of any unique details that I liked which may only be present in one or few of the images I had, for example small grass patches growing out or small pieces of red brick buried in there.

Then I moved to figuring out how to create the kind of detail that I needed to do (stones, grass patches, small twigs etc), which nodes to use and how to use them. I started with working on the Normal map and then from there used the same masks to create the other maps such as Albedo.


Looking forward to exploring it more

Sunday 21 June 2015

Some high poly modelling

Started doing some more high poly modelling, this one will be for the main door of the house


More WIP

Some more progress on the scene. Mainly working on the roofs lately, learning how houses/barns and their roofs are built, redoing some of the structural assets as well to make sure it's cleaner and reimporting parts as individual pieces rather than having them combined so I could instance them, adding some new placeholder assets in as well and iterating stuff.

Regarding the roofs, I originally planned to have corrugated metal type on the barn after looking at some references, but after some tests it just stood out too much and looked odd, so I switched to tiles. Studied the roofs in Assassin's Creed: Unity to figure out how to do them nicely so they wouldn't look flat as hell. It came down to extruding some of the tiles out, mainly around the edges of the roof to make the silhouette nicer, but also all around the roof. also selecting multiple ones in several places and extruding them in a little, and deleting some of the tiles to reveal the planks underneath which is something AC: Unity didn't do but I thought for an abandoned building it would look interesting:


(The dark patches are lightmap errors)

I tried tessellating the tiles as well since I had a height map baked out, but it looked quite awful and distorted, and it also required me to add an edge loop around every single tile to avoid it looking even more distorted, so I thought I'll stay away from it. Might experiment with a POM shader in the future though.

Right now I still need to finish them off and do some vertex blending of moss, dirt and broken tiles to break up the tiling and get the roof to look less plain.


Saturday 13 June 2015

Photoshop PBR value swatcher


I was looking to start a swatch set to store base sRGB albedo values for different surfaces, so I wrote a quick Photoshop script to make the process faster and less tedious.

It's pretty self explanatory, but I'll quickly go through it. You can input linear values (in either 0-1 or 0-255 range) as well as names into the textfield, separated by a comma and one per line i.e.:

0.25,grass
0.04,charcoal
0.85,fresh snow

and the script will loop through them all, convert the values to sRGB and add them into your current swatch set.

There is a checkbox called Colorize, when ticked it pops up a color picker dialog for each value before adding it as a swatch, so you can tweak the color if you don't want it to be a greyscale value.

You can find the values on the charts that are available or somewhere else on the internet.

Download the script here: 
http://edpetrauskas.co.uk/downloads/pbr_value_swatcher.js

Place it in your "photoshopdirectory\Presets\Scripts" and access it through File->Scripts in Photoshop, or make an Action or something and bind it to a key :)

Monday 8 June 2015

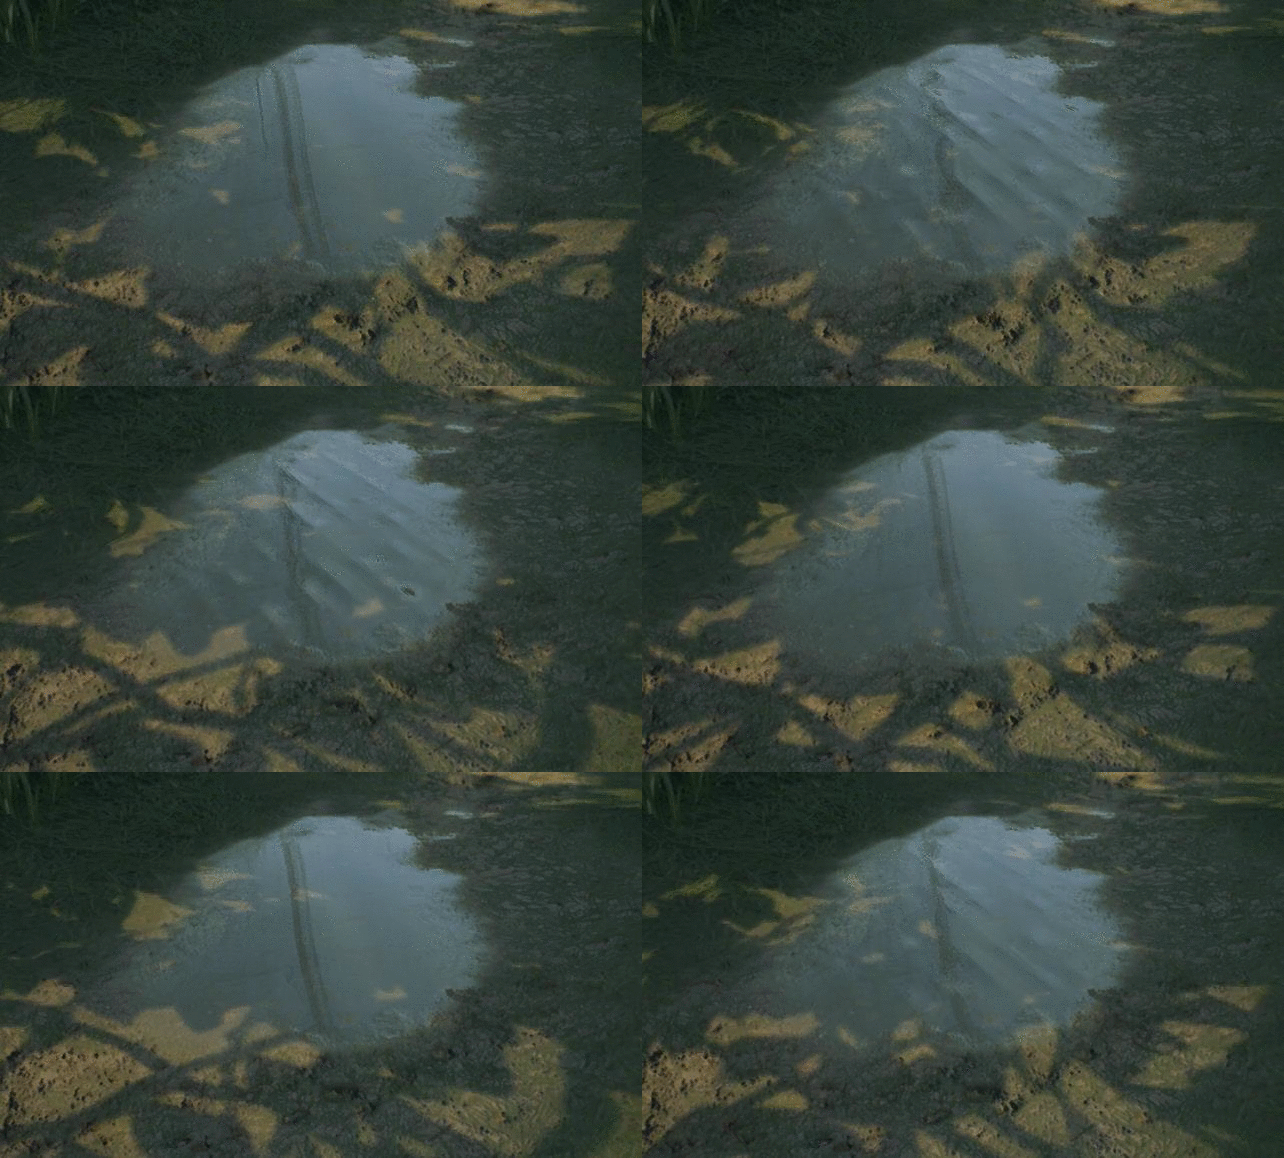
Puddles!

I wanted to add some puddles into the scene. I checked out the awesome article from the "Remember Me" guys (https://seblagarde.wordpress.com/2013/01/03/water-drop-2b-dynamic-rain-and-its-effects/) and it seemed pretty straight forward on how to do it, except that I wanted to have the puddles on UE4's Landscape and not a static mesh, so it quickly became a bit less straight forward :D.

While in general it worked, the main problem was that there is no way to get the value of the landscape paint layer (or at least none that I could find) the way that you can get the value of the vertex color that is painted on a static mesh. It was important because the value controls the transition between puddle and dry land in the material to tell it how saturated / opaque it is etc.

The solution was... pixelz! I created a black and white texture mask where I wanted to puddles to be and then I was able to plug it in my landscape material on top of the landscape paint layers to add the puddles in. Not the best solution, but for a small scene like this it worked well and because it was a texture, I was able to get the value of it to control parts of the puddle material where normally vertex color values would be used.

Since the landscape is pretty huge and it would require the texture mask to be gigantic in size, to get better texel density I tiled the mask on the terrain in the way where the puddles still roughly align to where I originally wanted them to be, and then any of the ones that end up repeated around are removed using another mask which can be low resolution.


I also decided it would be nice to add some subtle wind to the puddles, since the scene is a bit windy. A quick and dirty approach for now was to pan a tiling wavy normal map across puddle, which is lerped with a flat normal and the alpha of the Lerp is controlled by Time plugged into Sine nodes and randomized a little.


Progress on the scene

Some slow progress on the scene.

I gave in to the idea of surrounding the area with trees (breaking bad scene all over again! ;D). I thought it will look better and definitely make more sense from gameplay perspective instead of leaving it open as it was before. I didn't want to close all of it off though, so I left a part of it open which shows vistas of buildings of a city that is nearby. I thought the idea could be that it is the destination for the player(s), who emerge from the forest and are forced to explore the farm house and stay there overnight because it's getting dark and they are too low on supplies to continue on the path to the city.


Reorganizing and custom tools

I'm not dead! Just been a bit busy, but I've spent some time tidying up the project and thinking of ways to stay more organized and work faster. One of the things I did was revisit Mel script so I'd be able to write myself some tools to improve my workflow for this as well as any future projects.

I noticed that my projects were always becoming messy and it was really slowing me down, so I rethought my folder structure and then wrote a little Maya tool to help keep myself organised and work faster:


It let's me add/remove categories for assets and specify export folder for them, for instance Foliage, House Interior, Exterior Props etc, and then assign them to any mesh in the scene which then allows for fast one-click exporting as well as having quick access to all of the assets if I want to open them or insert them into the current scene, without having to search through the folders.

It also allows for one-click texture exporting, it grabs the textures plugged into the shader of the model, asks me whether it is a tiling or unique texture and then copies them into the correct folder inside my project directories.

Besides that, it has some smaller features that I found are quite useful, for example creating a new asset, which allows me to pick a starting shape i.e. cube / cylinder / plane etc., and creates a new scene with it as well as a scale reference on the side of it which is semi transparent and added to a layer that is set to be Render-only. Apart from that I am also able to add a new scale reference in and quickly apply a checker material to a selected object.

I found that the tool works really well together with UE4's auto import. I made it scan the folders to which my Asset Manager tool exports the models and textures to, and auto import them into the project. Works super smoothly!


Next on the list is to identify some of the common workflows I use while creating certain type of assets for example foliage or architecture and create a tool to have quick access or to automate some of the aspects.

I've also looked into hotkeys which for whatever reason I never really used much in the past. Maybe because of the clunky pre-maya 2016 hotkey editor, which they have now updated to be much nicer to use. I've set up keys for some of the most common tools I use e.g. extrude, bridge, multi-cut, merge verts, bevel etc., as well as some custom commands. One trick I found to minimize the amount of key combinations, is to assign different commands to the same key combination but based on the component that is selected. For example having edges selected activates the Connect tool, having whole model selected activates Add Edge Loop, and having faces selected activates multi-cut. This requires some Mel (or python) scripting, but it works really well ^^